By: Bruce Pfund
The author is a construction industry consultant. His company, Special Projects, is in Weekapaug, R.I.
Featured in the June 1987 National Fisherman
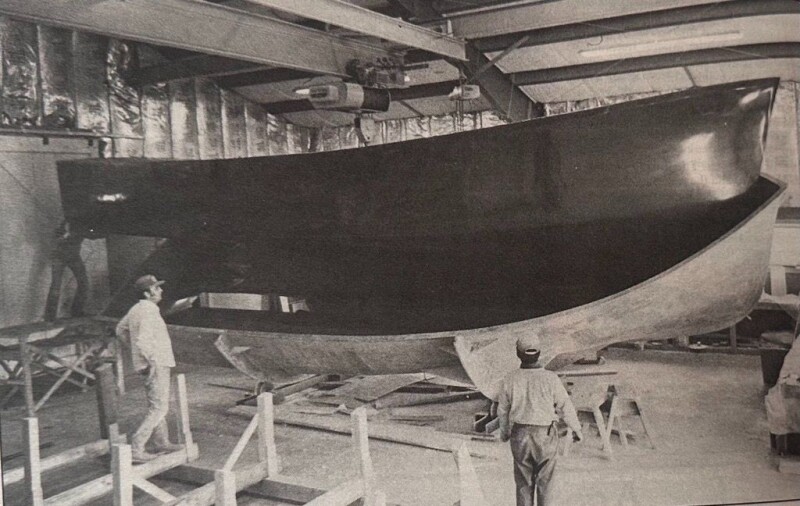
A production fiberglass boat is only as good as its mold, so it makes sense for a buyer to check out a prospective boat shop’s tooling. It takes a trained eye, however, because seemingly beautiful molds can turn out terrible parts, and rough-looking tooling can produce acceptable parts after being rubbed out or given another gelcoat.
Don’t be alarmed if a shop hasn’t made its own molds. Plug lofting and tooling design skills are different from the laminating talents required for boatbuilding, and the time and expense of mold-making have been the downfall of many small boat shops. Tooling shops that make nothing but plugs and molds offer proven systems at reasonable costs and paying off the mold is the price of each boat.
What To Look For
It’s not uncommon to sight down the hull side and see a series of evenly spaced ripples. Wavy hulls are spawned in both wavy and fair molds. Sometimes, inadequate support framing lets a good mold distort. That’s easily corrected and easy to see if you’re visiting a boat shop. Subtle bottom contours that may rob the hull of a few knots of speed and many extra gallons of fuel are harder to spot, but all it takes is practice.
When checking a mold, look for inside and outside corners with a generous radius. It’s a tipoff that the mold maker was smart. Tight corners are hard to spray with gelcoat and difficult to laminate. They end up resin-rich, get hot while curing, and then shrink like mad afterward. That’s why the gelcoat spiders are most common in corners. Accurate mold making and boatbuilding are a constant struggle against resist shrinkage, as we will see.
Inspecting hulls and molds for finish and fairness requires a good eye- but there’s a trick that can help you out. Look down at the hull side, toward the stern. Keep your eyes level and move your whole body side to side. Try to look “around” at the curvature of the hull—state by tracking the waterline or chine and then check the shiny gelcoat above it.
Watch for reflections in the surface of the part. For years, thin wooden battens have been used to judge the fairness of parts. Reflections of straight shapes are just as effective. Outside, the reflections of spars and rigging serve nicely; in the shop, fluorescent light tubes are best. Moving your head allows the reflection to travel across the part. If the straight reflection of a fluorescent tube suddenly develops a wiggle, the panel is not flat.
Use whatever reflections are available as “optical battens” to check the hull bottom for flatness. Pay particular attention to the last 3’ because there’s usually a large area of doubled laminate at the corner between the transom and the hull bottom. Excess resin can form a puddle in this area, creating a hot spot that can cause a hook in the last few feet of the bottom as it shrinks. Sometimes, mold makers will build a small crown in the plug’s bottom contours for the last 18” or so to counteract the mold’s tendency to go hollow in this area.
A warped mold will always make a warped product, and sadly, nothing can save a hull with a built-in twist or hook. But it’s also possible to create hulls with hooked bottoms in perfect tooling. A big, sloppy, wet overlap between the bottom and the transom panels will shrink up and make the after-bottom skin go hollow. The trick to avoiding this problem is to laminate critical areas like this with just a few layers at a time and with a minimum of resin. Panel overlaps should be staggered so thick areas gradually taper into thinner sections. Combine a crude laminate with a warped mold, and the hull that comes out will be a nightmare.
Hull Nightmare

Ripples in hull sides often correspond to where the structural support framework is glassed to the mold. The small strips of glass shrink while curing, and if the framework is stronger than the mold, the mold surface will be tortured at each bonding. Tooling resins are formulated for low shrinkage but are still a problem. Cored molds behave better. The tooling surface is the inside skin, and the frame is attached to the outside skin. The core acts as a stress absorber.
Bulkheads often print through hull sides on single-skinned boats and for the very same reason. It’s difficult to glass the bulkhead to the hull without leaving a resin puddle at the inside corner, which makes a localized hot spot during the cure cycle. Bulkhead print-throughs will be at different intervals than those from framing effects.
Sometimes the hull mold is fine, but the hull has wrinkles. What happened? Parts are often de-molded while “green” or not fully cured. When set on supports adequate for a fully hardened boat and deck assembly, the wobbly hull form tried to “fold up,” creating ripples in the sides and bottom. High-production shops that cycle their molds quickly use post-cure fixtures with large area supports to hold green parts in alignment.
Inadequate laminate strength is another cause of wrinkles. It’s not a tooling problem but a laminate design foul-up. Boats that look fine in the water but ripple when on cradles or trailers are immediately suspect. Lift one corner of the transom with a jack or forklift. How far can you raise it before the other side lifts off the supports? If the hull came from a two-piece mold, lifting loads are transferred across the hull by the laminates joining the two halves, whether it’s at the transom centerline or around the transom perimeter. If the hull flexes while out of the water, it certainly will be twisting while underway at sea.
Special Cases
Different construction systems may require specialized tooling, and molds get complicated fast as hull size increases. Builders must recover tooling costs, and expensive construction systems often require expensive tooling. It’s a vicious cycle.
For example, single-skinned hulls are inexpensive and can be easily laminated from outside the mold with rollers on extension handles. Very little weight is ever placed on the tooling surfaces, so light construction is OK. Switching to cored construction forces a rethink. Will the mold need “rockers” so that it can be tilted for accessibility? Once the workers get in the mold to lay down the core, will the light mold deflect and release the outer skin?

Split molds improve crew access for laminating and coring big hulls but come with their own problems. The two halves of the mold must be aligned very accurately to get the hull shape symmetrical. Look for lots of dowel pins and a good bolt pattern on the flanges that mate the half-hulls. Cross braces running sheer to sheer on uncommon, but often advisable.
Watch out for deep skegs and fins where the two half-hulls join. The hull skins in these areas are easy to laminate when the mold is split, but bonding the two skins together when the half molds are bolted up can be tough if the section is long and deep with poor access. It’s easy to create a brittle resin puddle down in the stub, just where the most strength is required in the event of grounding the hull.
Check for print-through along the bow and transom centerline, where the two hull halves are bonded together. Substantial laminates with staggered overlaps applied layer by layer will not print through to the outside skin of the hull. A sloppy, one-shot layup with badly tailored overlaps will get hot unevenly while curing, stressing the outer skin.
Resin shrinkage and the stresses it sets up at the bow overlap are a problem in making plugs, molds, and parts. Warping along the transom vertical centerline only occurs in hulls from split molds. One-piece hull molds make continuous laminates, from corner to corner, possible for the transom. There are lots of tricks to reduce this problem, and they’re worth discussing with your builder.
Duplicating the mold surface exactly is the boatbuilder’s job. The finish of a part can always be improved, but its shape can never be better than the mold from which it came. Why put all that effort into reproducing anything less than a perfect mold? Well-thought-out tooling and competent laminating go together, and a quick check of the olds assures that few, if any, problems are being laminated in forever, whether they’re areas of rough gelcoat or speed-robbing lumps and bumps in the bottom.


